Showing posts with label routine. Show all posts

Thursday, December 3, 2015

HAIR AND MAKEUP INSPIRED BY DEMI LOVATO @ the AMA's


If you watched the 2015 AMA's you would know how flawless Demi Lovato looked on the red carpet and during her performance! Once I saw her, I knew I had to recreate this look! She had lovely finger waves in her hair, a super dark smokey eye with black on the lid, and a beautiful burgundy lip. If you're feeling bold, this look would be perfect for a holiday party or a night out!


Let's start with the hair.. I always like to begin with my hair first to avoid getting hairspray on my face and ruining my makeup! Demi's hair has a vintage feel to it, so I wanted to create old Hollywood waves. To do this, you can use a curling iron, wand, or straightener. (YES! A straightener!) I prefer to use my straightener because my hair tends to last longer that way than with a wand. I created a deep part on the right side of my head then I sectioned my hair. Starting from the bottom I curled all my hair inwards towards. The key to this look is to curl all the hair the same way. If you want your hair to last all night, I would recommend that you pin each curl while its still hot, and leave until it is completely cooled. Once I curled all the hair in the same direction I let my hair cool. I usually let my hair cool until I am done with my makeup, this will also help the hair stay curled longer. Once the cooling process is done, I brush out the curls until they turn into waves. Be very gentle with your hair at this point. Start at the top of your head and go straight down. This may take a while but you should end up with waves that create an "S" shape.


Now, onto the makeup.. I created this look using my BH Cosmetics 5th Edition palette. But, you can use any shadow palettes you have.

First, I start with my usual Master Conceal by Maybelline as a base. I use a chocolate shadow as my transition shade with a large fluffy blending brush. I start every look with these two products, they're definitely my GO TO products!


Then, I take my black shadow on a shader brush. I like to pack on the product, the darker the shadow, the better this look will turn out. QUICK TIP: I recommend doing your foundation last because you will have a TON of fall out from the black shadow. I pack on the black shadow only on my eyelid.


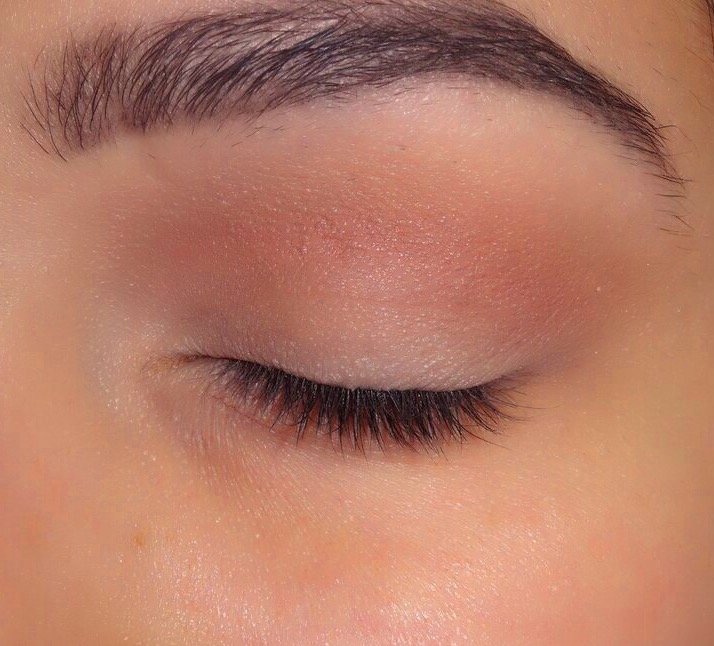
Now, BLEND until your arms fall off. If your arms aren't hurting, you didn't blend enough. Adding the chocolate shade at the beginning of the look will make blending the black so much easier. I use a clay/brick red color to blend out the black with a tapered blending brush. I like to use circular/ windshield wiper motions to blend out the black. TAKE YOUR TIME. This is the most important part of the tutorial, you don't want to end up with a black eye, so be sure to take your time blending.


At this point, I took a baby wipe and cleaned up all the fall out under my eye (IT WAS A LOT). I highlighted my inner corner with a champagne color and also my brow bone with a flesh toned color.

Time to apply Falsies! I am using Grand Glamour by Vegas Nay. Of course you dont have to use falsies but it will bring the whole look together. I also smoked out the bottom lash line with black and the two other shades I used in the crease.


Here's the finished look! I hope you enjoyed this look inspired by DEMI. Please leave any comments down below. If you have any questions/ business inquires please email me @ beautyinsiderbyna@gmail.com.
xoxo
-Feliciana

Wednesday, December 2, 2015

Everyday Natural Brow!

Brows shape and frame your face. Some people are blessed with thick beautiful brows, others were given tweezers in the 8th grade and no longer have much brow to work with. If that is you, don't give up, you too can give the illusion to beautiful brows! I have naturally thick brows, but on my left eye I have two scars that I like to fill in without making my eyebrow look too harsh. Here's my tutorial on how I do my everyday natural brow.

For this look I am using Anastasia Beverly Hills Brow Wiz in the shade Ebony, Maybelline Master Conceal in Fair, a shader brush, small angled liner brush, and a brow brush.
To begin I brush my brows into the position I want them. I like to make sure all the hairs are going with the shape of my brow. The Brow Wiz is double sided- on side is the product and the other is a spooly. To brush my brows I either use the spooly that comes with my Brow Wiz, or I will use a brow brush. 
  Next, with my brow pencil, I line the bottom of my brow using short strokes and applying light pressure.  I do this starting at the beginning of the brow (use your nostril as a guide to the start of your brow) until the tail of the brow. Your arch should be inline with the pupil of your eye.
Then, I focus on the tail of my brow and the scar in my brow. I like the tail end to be darker than the beginning for a more natural look. I fill in everything except the front of my brow. I use short strokes to achieve a natural hair like look.Then, I blend the color with my spooly to disperse some of the product evenly.
  The next step is optional, you don't have to do it. I like to take my concealer on a small angled liner brush and line under my brow, I also conceal the top of my brow from the arch to the tail. This will give the brow a clean and highlighted look. After, I blend in the concealer with a shader brush to get rid of any harsh lines.
Here is my finished look! I hope you enjoyed this natural eye brow tutorial! If you try this look out, post a picture on IG with the hashtag #beautyinsiderbyna so I can see your take on this tutorial. 

If you have any questions/ business inquires please email me @ beautyinsiderbyna@gmail.com 

xoxo
-Feliciana

Tuesday, December 1, 2015

Beauty Tip Tuesday: Lip Scrub

Today's beauty tip is all about lip scrubs!

Lip scrubs are important if you're a fan of matte liquid lipsticks like I am. Matte lipsticks tend to cake up on the dry skin of your lips because most of them aren't moisturizing. I have a solution for you- DIY 2 ingredient lip scrub.

For this scrub you're going to need 2 parts sugar to 1 part oil. I used Organic Coconut Sugar and Vitamin E oil, you can use what you have on hand. Coconut oil, olive oil, or grape seed oil work well. As for the sugar, pure cane sugar or brown sugar work great. You want the consistency of the scrub to be sorta like wet sand. 


Once you have your concoction all mixed up, you're ready to apply. I like to take a small amount, about the size of a pea and rub it in between my lips. I love doing this before I apply a matte lipstick because I don't have to worry about my lips drying out throughout the day. The oil in this scrub moisturizes my lips just enough so I won't have dry lips by the end of the night. As you can see from the before and after pictures, before the scrub my lips look dull and dry, but after the scrub my lips look flushed and have more of a pink/red tone than before. This happens because I am agitating my lips, this will also give a slightly more plump look, nothing drastic. When you're done rubbing the scrub on your lips, simply wipe it off with a damp paper towel. (or eat it, it is all natural after all LOL) I recommend doing this before you apply foundation so you don't disrupt your flawless foundation application.


Now you're ready to rock all the matte lipsticks your heart desires! I hope you enjoyed today's Beauty Tip Tuesday!
 

Monday, November 30, 2015

Airspun Setting Powder review!

After a long (much needed) Thanksgiving break, I am back! I hope everyone enjoyed their Thanksgiving with their families.

Today, I will be reviewing Airspun Loose Face Powder. I heard about this product from the amazing Patrick Starrr, he raves about this product on his Youtube channel, I knew I had to find this product and try for myself. I had to go on an adventure to find this product. I wasn't able to find it at my local Walmart, Walgreen, or Target. My last stop was K-Mart, in the beauty section I finally found it. You may have this product at your local store, you just have to search for it.

I have a HUGE problem with creasing under my eyes so I wanted a powder that was going to take care of that and leave me with a flawless under eye concealer. Airspun did just that! This powder is awesome for only $5.99. Patrick uses this product to bake with, which is also what I wanted to use the powder for. (If you don't know what baking is, I will be doing a post about it soon) I use this powder with a makeup wedge and pack it on to my under eye concealer, or I will use a fluffy brush to put a little under my eyes for a less dramatic effect. Let me tell you, this product did not budge all day. I did not have under eye creases by the end of the night, my concealer was still bright and highlighted. It was lovely. The powder does have a powdery makeup scent, but once you apply it to your face the scent goes away. I have tried many drug store setting powder but none have impressed me as much as Airspun has. Other products would fade away throughout the day so I would be left with blotchy concealer! Not cute!

Thank you Patrick Starr for raving about this product! It's amazing especially for a drug store product. Stay tuned for an in-depth tutorial on how I use this product! I hope you enjoyed this quick review on this lovely product. Check it out, and tell me what you think! Please follow my blog for more Beauty Insider.

Sunday, November 22, 2015

Salon Blowout Without Leaving Your house!

Who doesn't love a full, voluminous, bouncy blow out from the salon? Let's be honest, salon prices are outrageous, that's why I'm going to show you how to give yourself the ultimate blowout without going to the salon!
 
I bought all products from Sally's Beauty Supply!
For this look, you're going to need a blow-drier with nozzle, one large boar bristle round brush, medium size ceramic round brush, detangling brush, and clips or hair-tie.

I prefer to let my hair air dry over night, but if you want to start with wet hair fresh out the shower I would recommend that you flip your hair upside down and rough dry until your hair is 85% dry.

First, I detangle my hair with a detangling brush (The Wet Brush is a great option.)

After detangling, I seperate my hair into 1-2 inch sections starting from the bottom. With my large boar bristle brush I begin to smooth out small sections at a time. Boar bristle is great for adding shine to your look, and because its so large it will add volume as well. Focus on the roots first, getting the roots smooth is important to avoid frizz. Also, roll your brush under when you are drying the ends, this will create a slight curl and will add bounce to the finished look.


I continue this process with my large round brush until my hair is completely dry and smooth. The key to this look is to smooth out your hair so you don't have to use a flat iron. I stop right at the crown of my head. This is when things get serious, and important for this look.


The top of the head is where you want the most volume and bounce. I am going to start with smoothing out my bangs. I like to take my medium size round brush and put it at the base of my bangs. Then, I over direct my bangs forward, curling the ends under. Over directing the hair creates movement and volume!


I am going to repeat the process of taking small sesctions, over directing them forward, and curling them under until all the hair has been smoothed out. I am also going to continue to use a medium (1-2 inch) ceramic barrel brush. 

Blowing out your own hair is going to take practice, lots of patience, and a ton of elbow grease. You can skip arm day at the gym after blowing out your hair! The final product is a beautiful blow out that cost you nothing.

TIPS
  • Use a heat protector, my favorite is by Tresseme.
  • Take your time while blowing out your hair. 
  • Small sections of hair are key for smooth hair all over.
I hope you enjoy this hair tutorial! Let me know if you try it out on yourself! Please share this to anyone who loves to do their own hair. Follow my blog for more Beauty Insider everyday.

Saturday, November 21, 2015

3 Step Morning Skin Care Routine!


Starting my day off refreshed with my 3 step morning routine! 


First, I like to take a hot rag and drape it on my face for about 15 seconds. This helps open up my pores so I can deep clean my skin! Then, I take my silicone scrubber (I raved about this product on a previous post!) and I put 2-3 pumps of my Cetaphil daily cleanser. This stuff is great because it doesn't dry out my skin, especially in the winter! Using my scrubber, I like to gently scrub my face in circular motions until a nice bubbly layer covers my face. Then, with my hands I like to wash off the cleanser with warm water. 


Next comes my beloved astringent! Sea Breeze is made to remove trapped oil, dirt, and makeup before they cause problems to the skin. I've been using this product for many years now, I love the clean feeling it give me. To use this product, I like to soak a cotton ball in the Sea Breeze and smooth over my face. Sea Breeze gives a cooling feeling on the face, (that's how you know its working) perfect for waking up in the morning! This product is great for deep cleaning your pores as well. You can find this product at your local drug store, Walmart, or Target. 

  
Lastly, I finish with Bare Minerals Purely Nourishing Moisturizer for dry skin. The astringent can be drying which is why I like to follow up with a thick and nourishing moisturizer. This moisturizer quickly absorbs into the skin giving you a silky smooth finish to your morning routine! You can find this product at Ulta, or your local Bare Minerals store!


Friday, November 20, 2015

Tweezerman Tweezers Review

While out fixing my cracked screen at the mall, I couldn't help but notice Sephora in perfect walking distance from the kiosk. So, I drug my boyfriend to Sephora, and after a good fifteen minute stroll in Sepora I finally picked up a new pair of Tweezerman tweezers! The tweezers I got were awarded by Allure Magazine, so I knew they had to be good! 

I knew once I got home I had to review this bad boy. (I like to pluck my brows in between eyebrow threading sessions- it's been a while if you can't tell!) I've always been a fan of Tweezerman, and once I lost my other pair of tweezers I was devastated, so I could only hope these lived up to my standards. 

Let me tell ya, they did! I was able to get every stray hair, even those short, to get hairs! If you're a plucker like me, Tweezerman is they way to go. They are sharp with a nice slant that makes it easy to grasp the hairs. Check out my before and afters! 


Let me know in the comments if you've ever used Tweezerman tweezers! Follow my blog for more Beauty Insider! 

5 Ways to Exfoliate

Want clean, glowing, refreshed skin? EXFOLIATE! Exfoliating gives you a smooth canvas for lotions and potions to effortlessly absorb into your face or body. After exfoliating, you're left with smooth, plump skin. Here are my favorite ways to exfoliate! 


Facial Exfoliation 

1. Silicone Facial Brush 
You can find these at Walmart in the Beauty section, or on Amazon. I use my scrubber every day. I love it for mild exfoliation. Not only does it remove the dead skin cells, it also helps to remove all the makeup built up in your pores.


2. St Ives Blemish Control Scrub 
If you have acne prone skin, this is a great option for you! Salicylic acid is a key ingredient in this scrub. It's also a key ingredient in many acne fighting remedies. With this scrub, a little goes a long way, I use a quarter size amount for my whole face. Rub the scrub in circular motions, going in an upwards direction, this way you're fighting gravity and won't cause premature aging! 


3.  DIY Coconut Oil Exfoliating Scrub
For this scrub you will need coconut oil and pure cane sugar. Its super simple to make, I have talked about my love for this scrub in my Beauty Tip Tuesday post. Organic unrefined coconut oil is best to use for this scrub. If you are making this scrub for facial use: in a small container, mix one tablespoon of coconut oil and two teaspoons of pure can sugar. Apply gently in circular motions, in a upward direction. I promise you, your skin will feel better than ever before. 


Body Exfoliation 
  
4. Exfoliation Loofah Pads
Not only is the DIY Coconut Oil Scrub good for your face, its also great for your body! (Put a few drops of your favorite essential oil, I like lavender oil.) I like to use my DIY scrub with a loofah pad for ultimate exfoliation.  Be sure to change out your loofah every two weeks to avoid unwanted bacteria. 


5. Shaving 
Believe it or not, shaving is a great way to exfoliate your legs and arms. When you shave not only are you removing body hair, you're also taking a layer of dead skin off. That's why your legs are touch-ably soft when you are done shaving! 


Tips:
  • Be sure to always use a moisturizer after any type of exfoliation treatment to prevent dry skin. 
  • Don't over do it. Exfoliating is great, but there is such thing as too much. Once or twice a week is enough to give you clean, soft skin.


All questions are comments are appreciated! Follow my blog for Beauty Insider every day!

Thursday, November 19, 2015

Plum Eye Look

Purples and plum eye shadows are perfect for brown eyes! I have broken down my favorite eye look into easy to follow steps. For this look I used the Fifth Edition 120 Color Eye Shadow Palette by BH Cosmetics, but this look can be used with any plum shades you like, or change out the colors to fit your look for the day.

First, I started off with a clean eye and applied a base. For my base I am using Master Conceal by Maybelline in the shade 10 Fair. I like to use this as a base because it helps my eye shadow stay all day. After I applied the concealer, I set it with a skin tone powder.


Next, I applied a tan eye shadow from my Fifth Edition Palette. I used a large fluffy blending brush for this step. The key is to blend until you have flawless transition and no harsh lines. It won't look like much now, but adding a transiton shade to the top of the crease bone will make blending all other shadows so much easier.


I applied a second brick tone shade into my crease. I used a smaller blending brush for more precision. Again, blend until you can blend any more! By adding a brick tone, red-brown shade I am creading dimension in the crease. 


After my transition shades were blended together, I took the darkest plum shade on my palette and applied it to the outer corner until I covered about 1/3 of my eye. Be sure to pack this color on using a patting motion to get the most pigmentation and color pay off. With the same brush (shader brush) I also applied a small amount of black to deepen the look. By the end of the tutorial, you will see that I have added more dark plum and black to make the color POP!


Next comes the middle and inner corner, for this step I used a different shader brush. I applied a lighter plum color and a cranberry color to the middle lid. For the outer corner I applied a metallic plum shade. I made sure to pack these colors on as well.  


Next comes the winged liner. This step is optional! If you're not comfortable with a wing, you can simply have a thin line of eyeliner, or you can skip this step all together! I used my favorite cream eyeliner by E.L.F. with a small angled brush. Since this liner is smudge proof you can even apply it to your water line with your angled brush for an even more dramatic look.


Another optional step, but one of my favorites, FALSIES! I am wearing falsies by Vegas Nay in the style Grand Glamour. These are definitley one of my favorites for a night out, or dramatic look. You can throw on your favorite pair of falsies or a few coats of your favorite mascara.


Once I think I'm done I like to take a step back, check my work, and make any changes necessary. I tend to add more shadow where needed, and blend in places that don't look blended enough! I hope you enjoy my complete eye look!


Please leave any questions or comments down below! Don't forget to follow my blog for Beauty Insider every day!